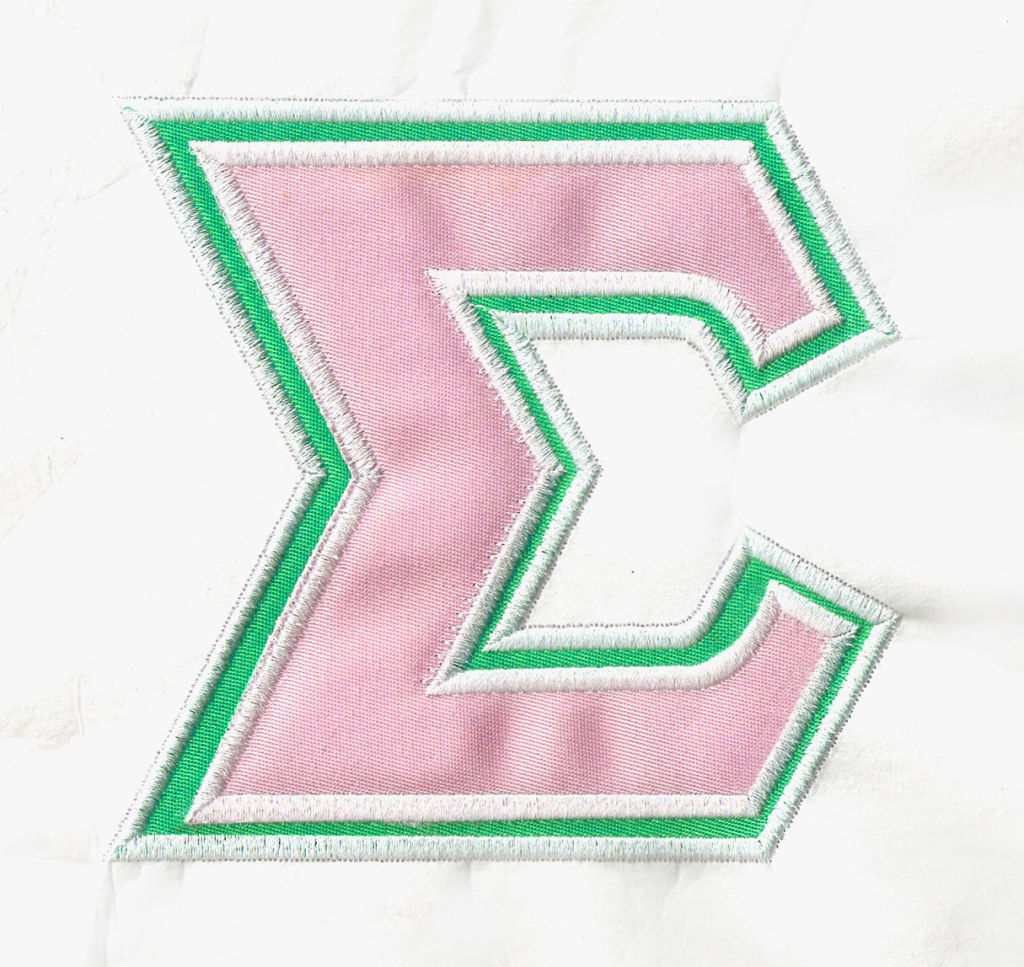

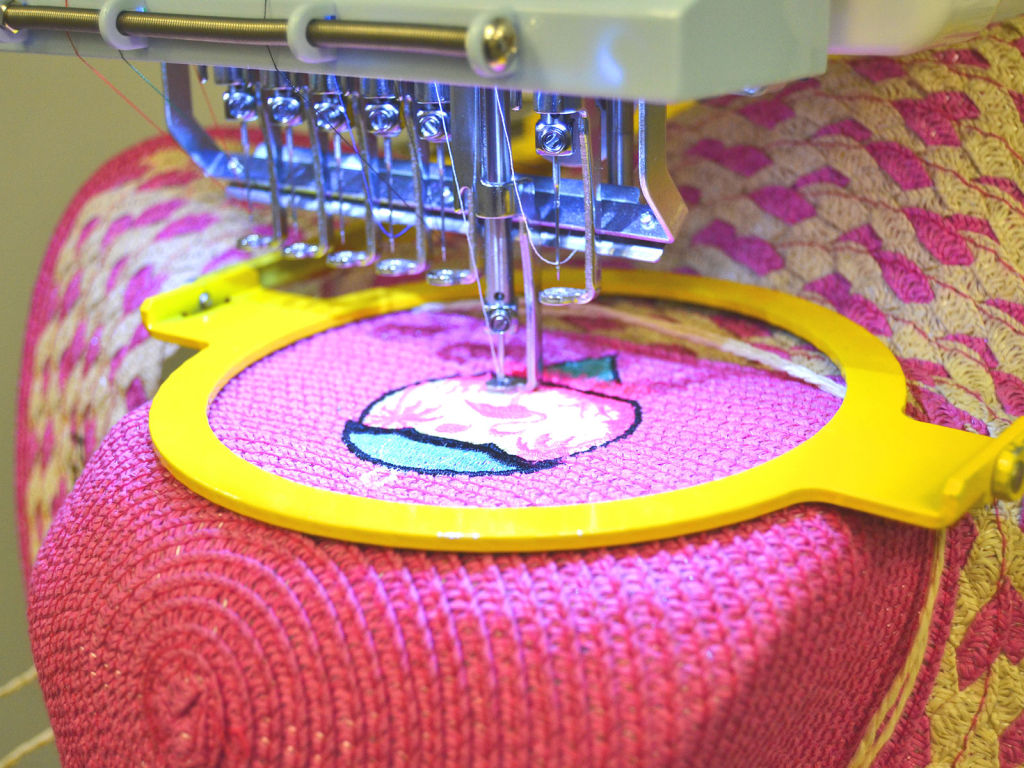
Project: 2-Stage Applique done with HAPPY Embroidery MachinesIn this project, we’ve sewn the 2-layer applique project pictured on the right. While not set up as a do-it-yourself project, this gives readers the idea that multi-layered appliques are just as easy as 1-layer appliques – the key difference being the need to pause the machine at more than 1 point during the sewout to place each piece. With HAPPY embroidery machines, this can be done at each color section, as often as the operator chooses. |
InstructionsWe used the following:
|

[dropcap boxed=”accent”]1.[/dropcap] Sew the first color section. Load the design and set your machine to STOP after sewing the first color. Then, hoop a garment and press START. The machine will sew the running stitch to outline the shape and wait for your to place the shape. |

[dropcap boxed=”accent”]2.[/dropcap] Place the first shape. Align the larger green shape with the mark stitch done in step 1. If there is no adhesive backing, you can use spray-on adhesive like KK100. Then, pres START. |

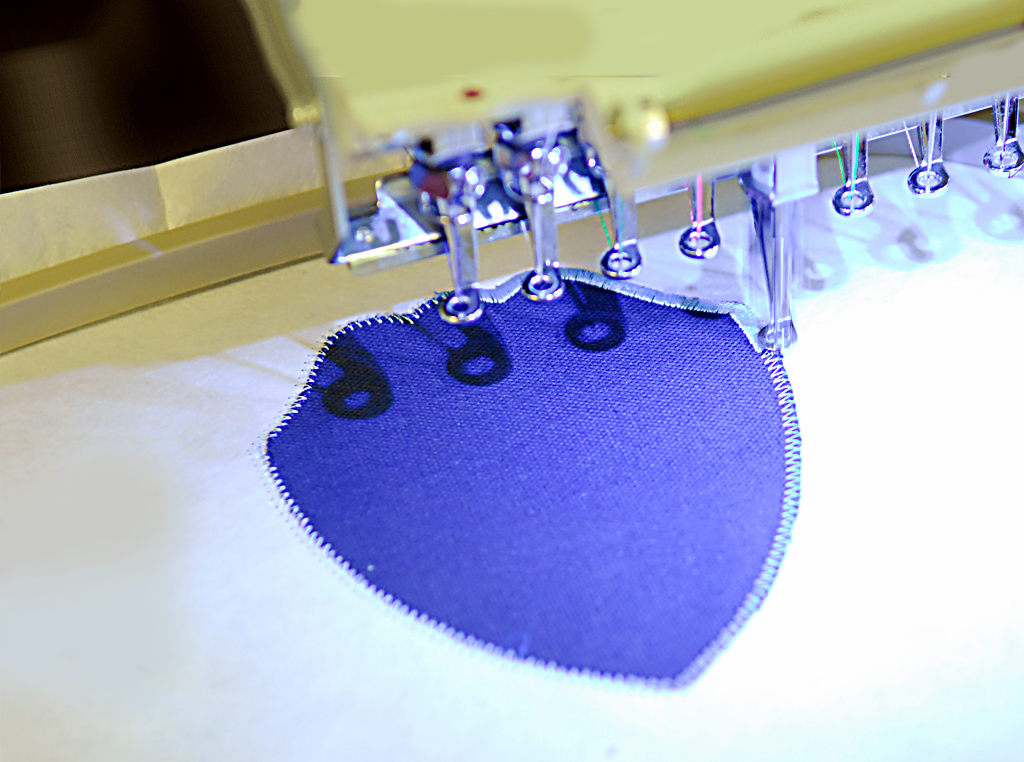
[dropcap boxed=”accent”]3.[/dropcap] The machine sews the tackdown stitch that permanently sews the edges of the shape onto the garment. |

[dropcap boxed=”accent”]4.[/dropcap] The machine sews the satin borderto give the outer edge a nice, finished look. |

[dropcap boxed=”accent”]5.[/dropcap] The machine sews the mark stitch for the interior and stops. |

[dropcap boxed=”accent”]6.[/dropcap] Place the inner shape and press START. The machine now continues to sew the tackdown stitch for the inner shape, then the satin stitch that covers it. |

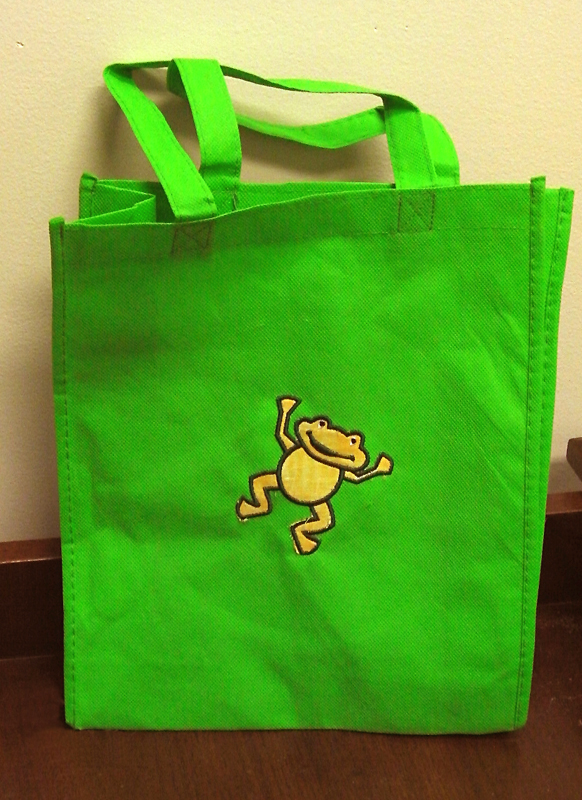
[dropcap boxed=”accent”]7.[/dropcap] Finished! AIn conclusion, the nice look of this 2-layer applique was simply done by telling the machine to stop at the appropriate times to place each layer. |

